
How To Build A Fire Pit In The Ground
Creating a cozy backyard oasis by knowing how to build a fire pit in the ground has never been easier.
These simple structures provide the perfect spot for gathering with friends and family.
This blog post will guide you through building your own in-ground fire pit, step-by-step.
Get ready to enjoy countless nights under the stars.
Gathering Necessary Materials and Tools
You will need several items. Here is a list:
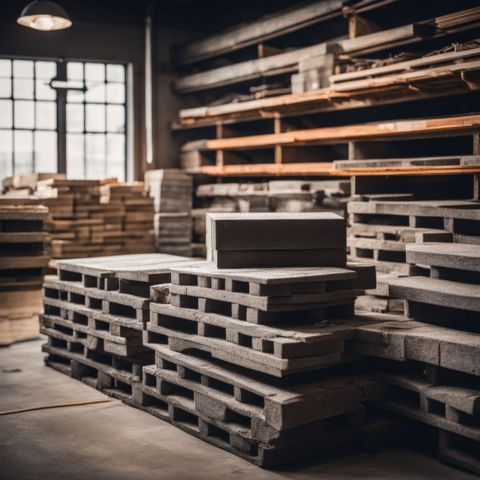
- Retaining wall blocks: these form the structure.
- Metal ring: this contains the fire.
- Concrete pavers or fire bricks: line the inside.
- Pea gravel: provides drainage.
- All-purpose sand: this levels the base.
- Shovel: for digging the hole.
- Level: to ensure the pit is even.
- Rake: for spreading sand and gravel.
- String and stakes: for marking the area.
- Measuring tape: to size the dimensions.
- Marking paint: to outline the hole.
Gather quality tools and materials. Shop at a home improvement store. Order online for delivery if needed. The quantity depends on the desired fire pit size.
Choosing the Right Location for the Fire Pit
Transitioning from gathering materials to picking a suitable spot is crucial. Fire pits require ample distance from structures.
Position the fire pit according to local regulations, ensuring it is placed a substantial distance from buildings, trees, fences, and overhead wires, often requiring more than 15 feet.

Having access to a nearby water source is crucial to quickly extinguishing unintended fire spreads, thereby enhancing safety.
Flat, level ground offers stability. Avoid dry areas prone to wildfires.
Consider wind patterns to prevent smoke from blowing into homes.
Local regulations may restrict pit placement. Check for underground utilities before digging.
Selecting an optimal location prevents hazards and enhances enjoyment.
Marking and Digging the In-Ground Fire Pit Hole
After deciding on the perfect spot for your in-ground fire pit, it's time to mark and dig the hole.
This crucial step sets the foundation for your outdoor gathering space.
- Use a rope or string to mark the center point and outline the desired diameter for your fire pit. A typical size ranges from 3 to 6 feet across.
- With a shovel or spade, trace the outline to mark where you'll dig. This visual guide ensures your pit maintains a neat, circular shape.
- Begin digging within the marked area to a depth of 6-12 inches, tailored to local conditions and safety regulations. While deeper pits enhance permanence and heat resistance, always prioritize ground stability.
- Level the bottom of the hole using a rake or tamping tool. This flat surface provides stability for the fire pit's base layer.
- Enhance drainage by gently sloping the bottom of the hole toward one side as you dig to facilitate efficient rainwater runoff away from the fire pit.
- Once dug to the desired depth and leveled properly, your fire pit hole is ready for the next building phase: laying the base and lining materials.
Marking and digging set the literal groundwork. Take your time, following the measurements precisely for an in-ground fire pit you'll enjoy for years.
Adding Drainage to the Fire Pit
Proper drainage prevents water accumulation. It allows airflow for efficient combustion.
- Directly beneath the center of the fire pit, dig a trench about 6 to 8 inches wide and 12 inches deep for drainage.
- Line the trench with gravel to facilitate water drainage.
- Install a perforated drain pipe in the trench's center. Connect it to a dry well or drainage system.
- Cover the pipe with more gravel, leaving space for the fire pit's base.
Effective drainage channels water away. It ensures your DIY fire pit functions safely. Adequate airflow fuels the flames evenly.
Constructing the Fire Pit
We are now going walk you step by step on the construction of the fire pit:
Lining the hole with sand
Sand creates a level base. Dig a hole at least 7 inches deep. Line the bottom with a 1-inch layer of all-purpose sand. The sand stabilizes the fire pit's foundation.
Placing the first row of bricks
Once you have carefully leveled the sand, place the first row of fire bricks directly on the sand layer. Ensure the bricks form a neat circle.
Leave a slight gap between each brick. This gap allows the first row to expand when heated.
Position the metal fire ring on the sand base, inside the brick circle. Cover any gaps between the ring and bricks with extra sand.
The first row establishes the fire pit foundation. Leading to the next step of inserting bricks into the fire pit floor.
Positioning the metal ring
Placing the metal ring properly is crucial. It provides the necessary support and structure for the fire pit.
The ring ensures air circulation, allowing the fire to breathe. It also creates a stable base, preventing the spread of fire beyond the designated area.
The metal ring acts as a guide. It helps align the retaining wall blocks and other materials during construction.
Accurate positioning of the ring is essential for the safety and durability of the fire pit.
Inserting bricks into the fire pit floor
Next, place fire bricks in the pit's base. Fire bricks allow air to circulate under the fire. Air flow prevents smothering the fire.
Arrange bricks in a square or circle. Leave spaces between bricks for air. Spread a layer of small gravel between the bricks. Gravel promotes drainage and air flow.
Adding pea gravel
This sentence can be removed as its content is already covered more effectively in the subsequent mention of pea gravel.
Use pea gravel to enhance drainage and prevent water accumulation, securing the stability of the base materials.
After the pea gravel, add a layer of limestone screenings for enhanced stability and a level base.
This layering creates a robust, concrete-like foundation that evenly distributes weight across the fire pit's floor, contributing to its longevity and safety.
The rocks' texture stops the surface from eroding over time.
Placing the remaining rows of blocks
The remaining rows stack atop the first row. Each row is offsets for stability. Construction adhesive secures all rows.
The final row levels for a smooth surface. Customized blocks create unique designs.
Attention to detail ensures a well-built fire pit.
After placing rows, the fire pit provides an inviting outdoor space. Friends and family gather around for warmth and conversation.
Backfilling the Edges and Compacting the Dirt Around the Fire Pit
Backfill edges. Compact dirt firmly.
- Limestone screenings pack strong. Provide a level base.
- Pour limestone screenings around the fire pit's outer edge.
- Use a tamper tool. Firmly compact screenings into the soil.
- Compact dirt thoroughly around the pit's circumference.
- Compacted soil stabilizes fire pit construction. Prevents shifting.
Fire Pit Safety Tips
Ensuring safety begins with properly compacting dirt around the fire pit. Keeping combustible materials away prevents accidental fires.
A perimeter of non-flammable patio pavers or gravel reduces fire risks.
Never use flammable fluids like gasoline for ignition. Avoid wearing loose clothing near an active fire pit.
Always keep a fire extinguisher or a garden hose nearby, and ensure children and pets are supervised around the active fire pit.
Ensure proper ventilation to mitigate smoke inhalation risks. Always completely extinguish the fire before leaving the pit unattended to prevent accidents.
Covering with a metal mesh screen prevents embers from escaping.
Following basic precautions allows you to enjoy your fire pit without incident.
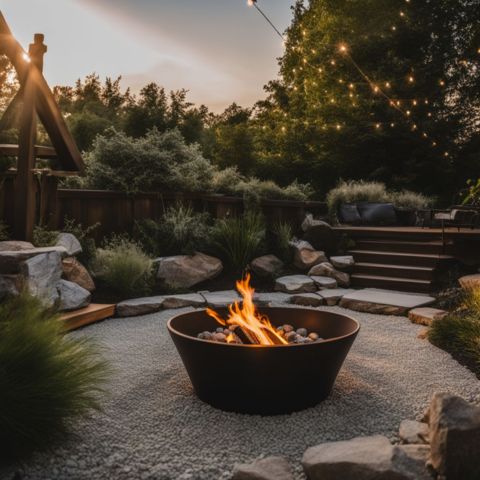
Enjoying Your Newly Built Fire Pit
Transitioning from fire pit safety, now comes the enjoyment part. You've worked hard and followed instructions diligently.
The finished product sits before you. Light it up carefully, following proper procedures. Gather family and friends around the warm, crackling flames.
Roast marshmallows or simply bask in the ambiance. Savor these special moments created by your very own fire feature.
Relish the outdoors in a whole new way.
FAQs
What is a French drain, and why is it important for a fire pit?
A French drain helps with draining water away from the fire pit area, preventing the coals from getting wet, and ensuring proper fire safety.
Can I use glue or adhesive when building a fire pit?
Yes, gluing the bricks or stones together with construction adhesive is recommended for a sturdy and long-lasting fire pit structure.
Is a fire pit suitable for a do-it-yourself (DIYer) project?
Building a fire pit can be a great do-it-yourself project for those with some experience in masonry work and who follow proper fire safety guidelines.
Can I burn wood in my in-ground fire pit?
Yes, an in-ground fire pit is designed for wood-burning, allowing you to safely contain the coals and enjoy the warmth and ambiance.
Conclusion
You now possess the knowledge of how to build a fire pit in the ground, so you can create a cozy backyard gathering spot.
It's always important to check local fire codes and regulations before building and using a fire pit, as compliance varies by location and can affect safety and legality.
A stone fire pit lends rustic charm while providing warmth on cool evenings. Gather the materials (rocks, sand, and gravel) and choose a level site.
Dig a hole, add drainage, and then methodically construct the circular wall. Finish by backfilling the pit with dirt.
Soon, you'll savor flickering flames and companionable conversation. Enjoy this affordable, functional outdoor feature for years.