
How To Fire Clay In A Fire Pit
Crafting beautiful pottery and knowing how to fire clay in a fire pit is an exciting process.
Fortunately, pit firing offers a simple and cost-effective solution.
This blog post will guide you through the steps to fire clay in a fire pit, allowing you to create stunning ceramic pieces at home.
Get ready to explore the joy of pit-fired pottery!
Understanding the Basics of Firing Clay
The firing process transforms clay from a soft, malleable material into a hard, durable ceramic object.
Firing clay involves heating it to high temperatures, typically between 1,832°F and 2,372°F (1,000°C and 1,300°C).
The firing temperatures provided are a general guideline.
Specific clay bodies may have varying maturation temperatures, and it is essential to consult the manufacturer or a ceramics expert to determine the optimal firing range for your selected clay.
This heating process, called vitrification, fuses the clay particles together, making the final product strong and water-resistant.
The type of clay and desired end result determine the firing temperature and duration.
Low-fire clays like earthenware are fired at lower temperatures, while high-fire clays like stoneware and porcelain require higher heat.
Proper firing is crucial to achieving the desired color, texture, and strength of the ceramic piece.
Steps to Fire Clay in a Fire Pit
First, find a suitable area to dig a pit.
Before beginning your pit firing project, it's crucial to research and adhere to local environmental regulations and guidelines, as the smoke produced can affect air quality and may be subject to restrictions in some areas.
Next, place the clay or greenware carefully in the pit. Be gentle, and arrange them nicely.
Digging a Suitable Pit
Dig a pit wide and deep enough to accommodate the pots or clay pieces. Choose a spot sheltered from the wind.
Use a shovel to remove soil, forming a hole with slanted walls. Make the pit's bottom flat for the pots to sit evenly.
An ideal pit size measures three feet wide and two feet deep for small batches. Larger pots require a wider and deeper pit.
The pit's dimensions depend on the clay pieces' quantity and size.
Ensure the pit is deep enough to cover the tallest pot with a six-inch soil layer. Leading to the next point...
Placing the Clay or Greenware
Place a pottery clay body or greenware in the center of the pit. Ensure the pieces are dry and leather-hard.
Arrange thicker pieces towards the center, surrounded by thinner ones. Space them evenly, leaving gaps for heat circulation.
Avoid stacking or overlapping. Use stoneware clays suitable for high firing temperatures.
While smooth stoneware clay can be used, it's important to note that traditional raku firing, which often involves removing pieces from the kiln while hot to add materials like horse hair, requires a kiln and specific safety measures.
Burnish pots with stone or terra sigillata slip before placing them in the pit.
Position the pieces on a bed of combustible organic material, like sawdust or wood shavings.
Adding the Necessary Fuel
Fuel selection is crucial. Primarily, use wood or charcoal.
Avoid using coal or coke, as these can release harmful fumes that are not suitable for pottery or the environment.
Stack the fuel around and above the clay pieces, leaving space for air flow. Start with tinder and small kindling, gradually adding larger pieces as the fire builds.
Carefully select combustible materials like straw, leaves, or sawdust to create a reducing atmosphere, which can add beautiful colors to the pottery.
Ensure the materials used are safe to burn and do not produce toxic smoke, and manage the fire carefully to maintain a safe and controlled environment.
Completely smother hot pieces with dry organic matter like pine needles for a glossy black finish.
Cooling Process
Clay cools slowly. Sudden temperature changes crack pots. Controlling cooling prevents breakage.
Place fired pots in ashes. Cover with dry materials like sawdust. Allow to cool naturally overnight.
Uncover pots when cooled completely. Smooth clay is especially vulnerable to thermal shock, which can cause cracking or breakage.
Gradually reduce the fire's intensity and allow the pieces to cool slowly in the pit to minimize this risk, rather than removing hot pieces immediately.
Insulating materials ease cooling. Sawdust, ash, and shredded paper minimize cracking risks.
Given the many variables involved in pit firing, such as fuel type, weather conditions, and the specific properties of the clay, results can be quite unpredictable.
It's important to manage expectations and understand that every firing can yield unique outcomes.
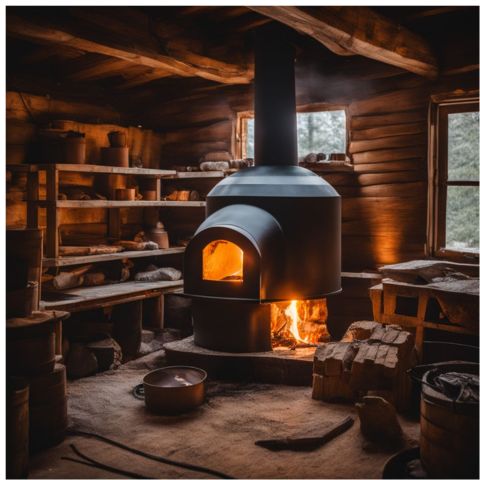
Using a DIY Kiln for Firing Clay
While DIY kilns can be a creative and cost-effective solution, they require careful construction and monitoring to ensure safety and effectiveness.
Always prioritize safety and consult experienced potters or resources. Cookie tins protect burnished surfaces during firing.
Plywood or chipboard boxes with holes create updraft kilns.

Sawdust, or wood shavings fuels homemade kilns.
Micaceous clay can exhibit a natural sheen when fired, but achieving a shiny surface typically requires specific conditions and may not always result from pit firing alone.
Ceramic artists explore DIY kilns for firing stoneware and micaceous clay pots.
Small metal cans shield delicate burnished surfaces during the firing process.
Crafting simple updraft kilns involves constructing boxes with holes from inexpensive plywood or chipboard materials.
Readily available sawdust or wood shavings provide affordable fuel sources for homemade pottery kilns.
Micaceous clay develops a beautiful natural sheen when pit-fired without glazes in DIY kilns.
Always prioritize safety when firing clay in a pit or using a DIY kiln.
This includes wearing protective gear, ensuring the firing area is well-cleared of any flammable materials, and never leaving the fire unattended.
Understanding and respecting the inherent risks of these processes is crucial for a safe and successful firing experience.
Safety Measures During Pit Firing and Using a DIY Kiln
Pit-firing clay outside carries risks. Wear protective gear like goggles and gloves.
When using a DIY kiln, ensure your setup allows for proper airflow and heat distribution.
While cans with holes can be used for small items, larger pieces require carefully arranged spaces to ensure even heating.
Surround the spaces with wood shavings and foil. Keep water nearby in case of a fire.
Monitor the process carefully.
DIY kilns demand caution. Work in well-ventilated areas. Use fire-resistant materials like ceramics or bricks.
Avoid flammable items nearby. Follow manufacturer's guidelines for operation.
Never leave an active kiln unattended, and always have a fire extinguisher or bucket of sand ready for immediate use to ensure safety is prioritized at all times.
Alternative Methods of Firing Clay
Alternative firing methods exist. One option is pit firing using a charcoal grill. You can also pit fire without digging a pit. Check out the following section for details.
Pit Firing Using a Charcoal Grill
Pit firing clay on a charcoal grill provides an alternative method without a kiln.
Preheat pots on the cooking grid before placing them directly on hot coals. Different clays, like micaceous and smooth stoneware, work well.
Decorate pots with copper foil tape, gold leaf pens, or horsehairs before firing.
Wrap the decorated pieces in aluminum foil for protection. Various tapes create unique effects but require foil wrapping when grilling.
Pit Firing Without a Pit
While alternatives to digging a pit exist, like using a metal container, ensure that any container used is made from a material that can safely withstand the firing temperatures without degrading.
Line the base with a soft brick or ceramic fiber blanket. Place the greenware pottery above the insulation.
Surround pieces with combustible materials like sawdust, wood shavings, or paper.
Light the fuel atop and around the pottery. Tend the smoky fire, adding fuel periodically. Control airflow with a lid or tin foil.
After reducing the smoke, cool slowly before retrieving the pottery.
Different Types of Clay Suitable for Pit Firing
Grog clay reduces shrinkage and prevents breakage during firing.
Micaceous clay, traditionally used for Native American pottery in New Mexico, resists heat shock well.
Smooth stoneware clay suits pit firing and burnishing with stone or terra sigillata for smoke effects.
Source clays from suppliers like Coyote Clay, New Mexico Clay, and Industrial Minerals Company.
Pit-firing earthenware pottery requires appropriate clay types to withstand high temperatures. Choosing the right material is crucial for successful results.
FAQs
Can I fire clay pottery in a campfire?
Yes, you can fire clay pottery in a campfire, but it requires careful monitoring and control of the temperature to achieve sintering without causing fractures.
What types of clay can be fired in a fire pit?
Clays with a higher alumina content, such as those used for wheel-thrown cooking vessels, are better suited for firing in a fire pit than clays used for sculpting or other purposes.
Can I use materials like plastic, chip board, or tile in a fire pit for firing clay?
It's essential to use materials that can withstand high temperatures without releasing harmful fumes.
It is crucial never to use materials like plastic, chipboard, or any treated or coated materials, including glazed tiles, in a fire pit for firing clay, as they can release toxic fumes and are unsafe at high temperatures.
Can I use a gas grill instead of a fire pit to fire clay?
Using a gas grill for firing clay is generally discouraged due to the high risk of damaging the grill and the potential for personal injury.
If considering this method, it's essential to conduct thorough research and fully understand the specific requirements and safety measures needed to mitigate risks.
Controlling the temperature and ensuring a safe environment for firing are significantly more complex with a gas grill than with a dedicated fire pit or kiln, and it may not provide the desired results or safety needed for effective clay firing.

Conclusion
Learning how to fire clay in a fire pit offers a unique way to create beautiful pottery. Safe handling during the entire process is crucial.
Choosing the right type of clay enhances the final product's quality.
A DIY kiln provides an alternative firing method for those without access to traditional kilns.
Exploring different firing techniques can lead to exciting discoveries in the art of ceramics.